Blog
Unity + Meta Quest on Apple Silicon
If you’re looking to develop Unity projects for Meta Quest devices using macOS with an M-series chip, it recently got a little easier. This is a step-by-step guide to setting up a fresh environment with Unity, the Meta XR Simulator, your Meta Quest device, and an Xbox Wireless Controller on Apple Silicon. Before we begin, it’s important to note that Meta’s Unity Link tool is still not supported on macOS.
We’ll first install the Meta XR Simulator and its dependencies, then configure it in a new Unity 6 project, and map an Xbox controller to its input. Then we’ll hook Unity up to our Meta Quest device as a build and run target, and map its controls to the simulator as well.
Install Homebrew if you don’t already have it.
Meta XR Simulator Setup
The simulator relies on the Vulkan SDK. Download it
from here. Unzip it and run the installer app
InstallVulkan.app. The options you select during installation are important!
Press Next on the welcome screen of the installer. Press Next again to use the default installation location (or select a custom one if you’d like). On the Components screen, make sure that System Global Installation is selected:

Press Next and continue the rest of the installation as normal.
Once that’s complete, install the simulator itself in terminal:
brew tap Oculus-VR/tap
brew install meta-xr-simulator
Now we need to run the post installation script. First find the version of the simulator you just installed:
ls -la /opt/homebrew/Cellar/meta-xr-simulator/
Then use it by replacing __VERSION__ when running the script:
sudo /opt/homebrew/Cellar/meta-xr-simulator/__VERSION__/post_installation_macos.sh
At this point, the simulator should be fully installed and configured.
Unity Setup
Grab the Unity Hub if you don’t already have it:
brew update
brew install --cask unity-hub
Open Unity Hub and go to Installs and then Install Editor. Select Install next to the latest version at or
above 6000.0.30f1:

Be sure to include the Android Build Support, this is also important!

When that installation is complete, go back to Projects in Unity Hub, and make a new 3D project. Meta recommends using the Built-In Render Pipeline, though I’ve got mine working with the Universal Render Pipeline.
Choose your location, name, and Unity services as desired and click Create project.
Project Setup
With your Unity project open, go to Window → Package Manager → Unity Registry and search for OpenXR Plugin
and install it:

The version should be at or above 1.13.1. Close any windows that pop up, we’ll come back to them. Next we need to add
some assets. Because our simulator must be installed with Homebrew, we cannot use the
Meta XR All-in-One SDK!
Instead, we will install the individual SDKs that we need:
- Meta XR Core SDK
- Meta XR Audio SDK
- Meta XR Haptics SDK
- Meta MR Utility Kit
- Meta XR Platform SDK
- Meta XR Interaction SDK
- Meta XR Interaction SDK Essentials
Add each to your assets in the Unity Asset Store using the links above, and Install each of them in the Package Manager in Unity:

The latest available version should be at or above 71.0.0 and no longer requires experimental packages. It will
prompt you to Enable Meta XR Feature Set, so select Enable and then Restart Editor. When it’s restarted,
finish installing the SDKs from the Package Manager.
When you get to the Meta XR Interaction SDK, it will prompt you to choose a hand skeleton SDK:

Follow the advice and choose Use OpenXR Hand. That installation can be your last as it also installs Meta XR Interaction SDK Essentials. Close the Package Manager.
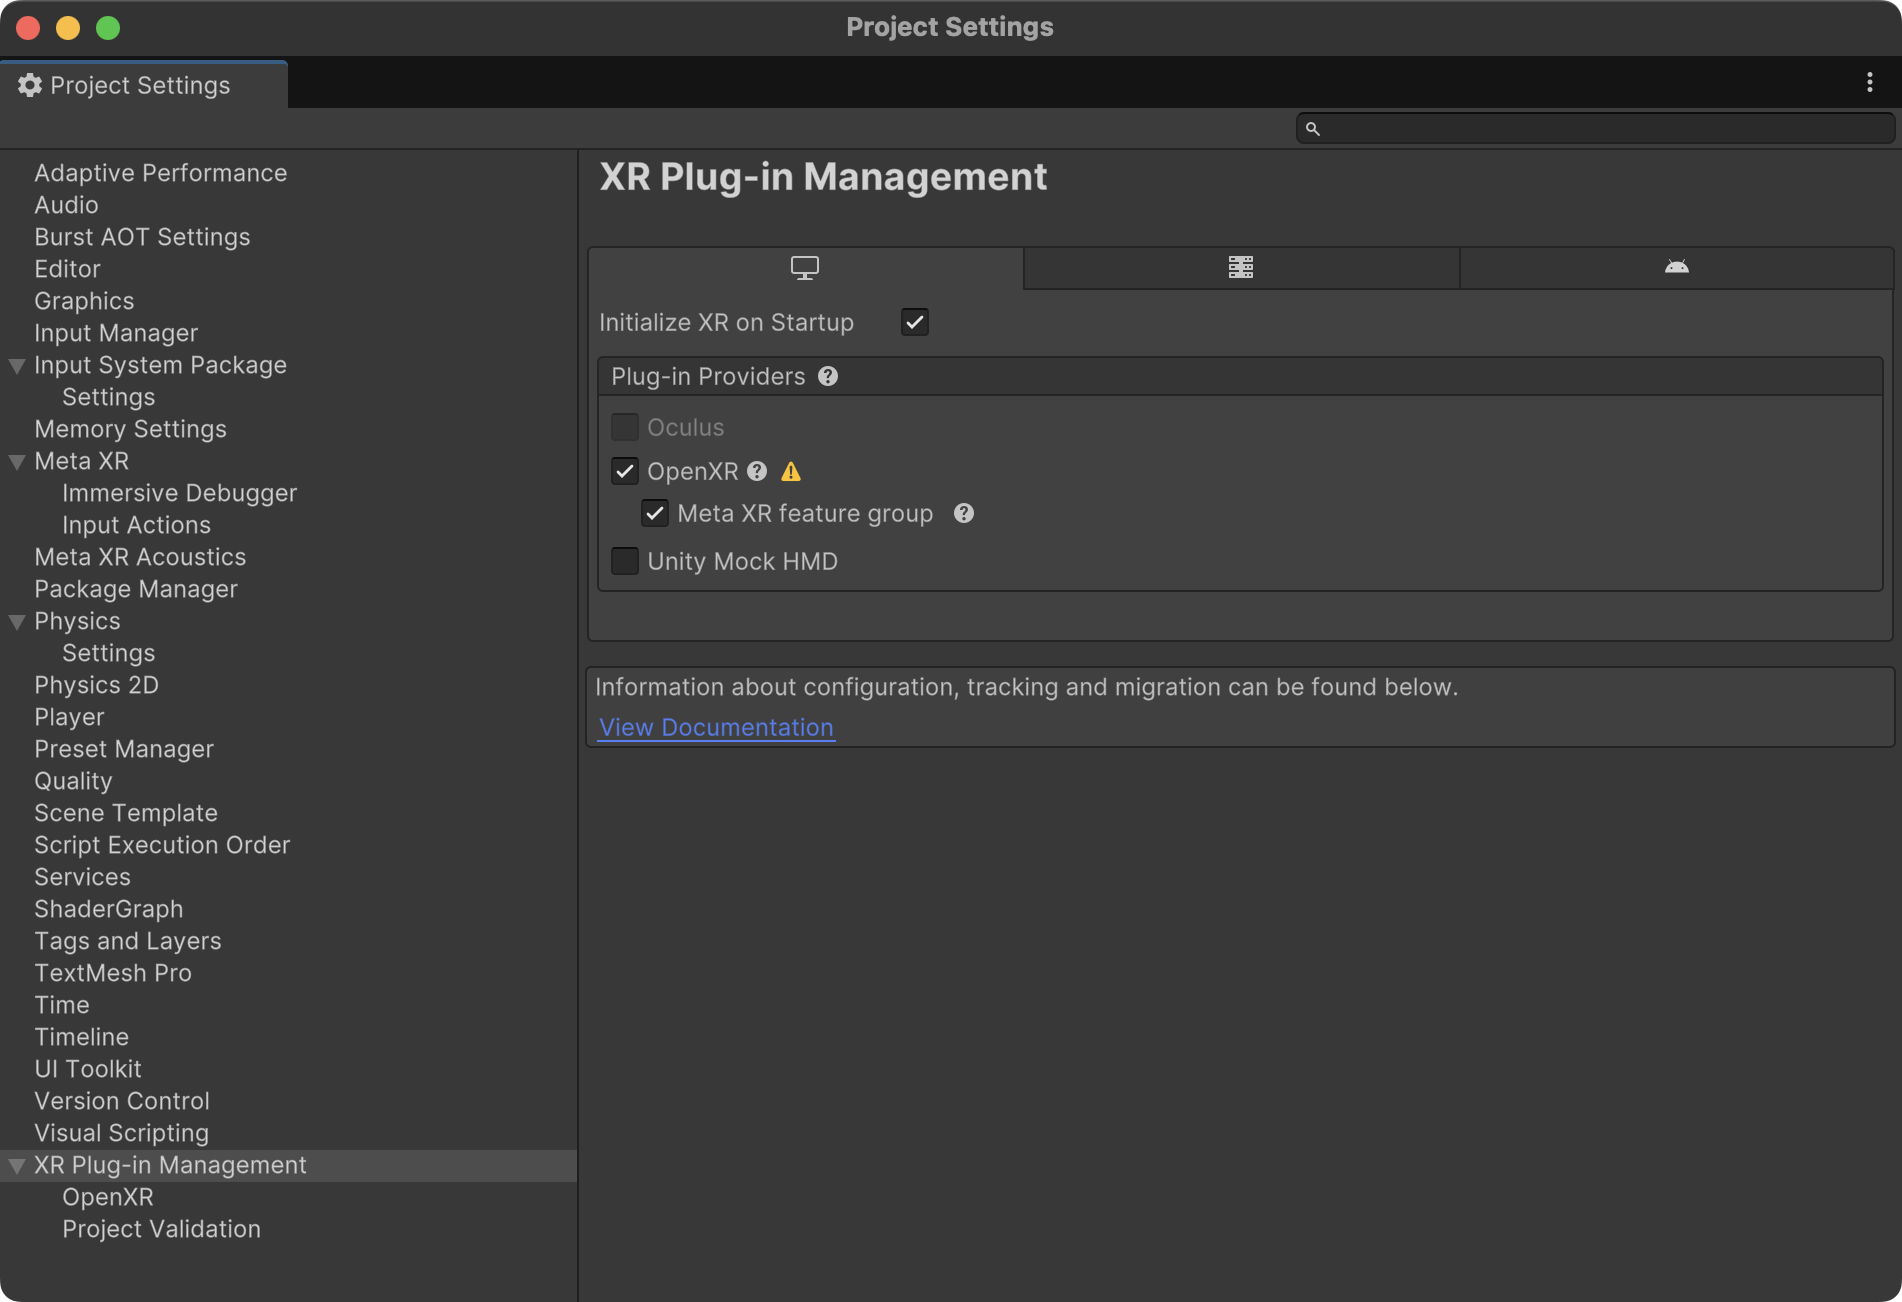
Almost there! Let’s go to Edit → Project Settings… → XR Plug-in Management and enable OpenXR on each platform tab:
Then go down to Project Validation and click Fix All on each platform tab:

And finally we go up one item on the left menu to OpenXR and set the Play Mode OpenXR Runtime to Other:

A file selector will pop up. Use command+shift+G and paste in your simulator path from earlier, remembering to
replace __VERSION__:
/opt/homebrew/Cellar/meta-xr-simulator/__VERSION__/
Hit return to navigate to that folder, and select the meta_openxr_simulator.json file and click Open.
That’s it! Run your project with the normal Unity Play button and it should now launch in the simulator:
Xbox Controller Setup
We will follow this guide from Apple to pair the controller. Hold down the pair button on your controller until it starts flashing rapidly. Then open System Settings → Bluetooth and connect to it:

If you relaunch the simulator, and open the Inputs window, you should see the controller available now:

come back to this https://developers.meta.com/horizon/downloads/package/oculus-developer-hub-mac